OWASP에 모바일 어플리케이션 Crackme가 있다고 해서 풀어보았다.
첫 번째로 Android Uncrackable level 1 이다.
문제는 아래 링크에서 다운받을 수 있다.
OWASP-MSTG
Android/Level_01 폴더에서 UnCrackable-Level1.apk를 다운받아 Nox Player로 열어 보았다. (apk 파일을 Drag&Drop로 에뮬레이터에 넣으면 설치할 수 있다.)
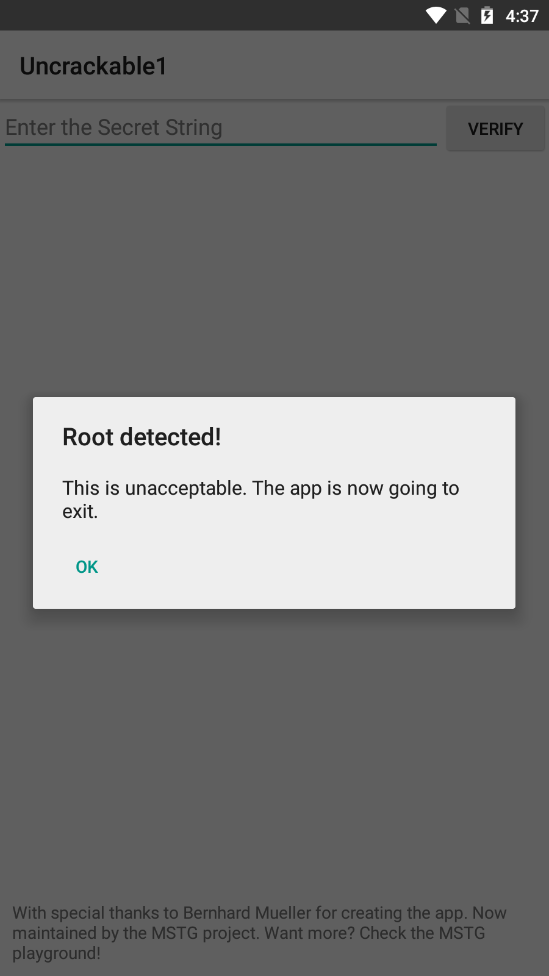
열어 보니, Root detected! 라는 알림창이 뜬다.
루팅 탐지가 있는 것 같아 먼저 jadx-gui로 apk 파일을 열어보았다.
Uncrackable1 패키지의 MainActivity 코드는 아래와 같다.
 1
 2
 3
 4
 5
 6
 7
 8
 9
10
11
12
13
14
15
16
17
18
19
20
21
22
23
24
25
26
27
28
29
30
31
32
33
34
35
36
37
38
39
40
41
42
43
44
45
46
47
48
49
50
51
52
53
54
55
56
57
58
|
package sg.vantagepoint.uncrackable1;

import android.app.Activity;
import android.app.AlertDialog;
import android.content.DialogInterface;
import android.os.Bundle;
import android.view.View;
import android.widget.EditText;
import owasp.mstg.uncrackable1.R;
import sg.vantagepoint.a.b;
import sg.vantagepoint.a.c;

public class MainActivity extends Activity {
    private void a(String str) {
        AlertDialog create = new AlertDialog.Builder(this).create();
        create.setTitle(str);
        create.setMessage("This is unacceptable. The app is now going to exit.");
        create.setButton(-3, "OK", new DialogInterface.OnClickListener() {
            public void onClick(DialogInterface dialogInterface, int i) {
                System.exit(0);
            }
        });
        create.setCancelable(false);
        create.show();
    }

    /* access modifiers changed from: protected */
    public void onCreate(Bundle bundle) {
        if (c.a() || c.b() || c.c()) {
            a("Root detected!");
        }
        if (b.a(getApplicationContext())) {
            a("App is debuggable!");
        }
        super.onCreate(bundle);
        setContentView(R.layout.activity_main);
    }

    public void verify(View view) {
        String str;
        String obj = ((EditText) findViewById(R.id.edit_text)).getText().toString();
        AlertDialog create = new AlertDialog.Builder(this).create();
        if (a.a(obj)) {
            create.setTitle("Success!");
            str = "This is the correct secret.";
        } else {
            create.setTitle("Nope...");
            str = "That's not it. Try again.";
        }
        create.setMessage(str);
        create.setButton(-3, "OK", new DialogInterface.OnClickListener() {
            public void onClick(DialogInterface dialogInterface, int i) {
                dialogInterface.dismiss();
            }
        });
        create.show();
    }
}
|
맨 위의 a() 메소드는 제목에 인자인 str을, 본문에 This is unacceptable. The app is now going to exit.이 있는 알림창을 띄우고, 해당 알림창에서 OK 클릭 시 System.exit(0)를 호출 해 어플리케이션을 종료시킨다.
onCreate를 보면 c.a(), c.b(), c.c() 메소드 호출 후 하나라도 참이라면 Root detected!를 인자로 앞서 확인한 a() 메소드를 호출한다.
또한 b.a() 메소드 호출 결과가 참일 경우에는 App is debuggable!를 인자로 a() 메소드를 호출하기 때문에 해당 함수들을 확인하여 우회해야 앱을 실행시킬 수 있다.
먼저 b.a() 메소드의 코드부터 확인 해 보면 아래와 같다.
1
2
3
4
5
6
7
8
9
|
package sg.vantagepoint.a;

import android.content.Context;

public class b {
    public static boolean a(Context context) {
        return (context.getApplicationContext().getApplicationInfo().flags & 2) != 0;
    }
}
|
context.getApplicationContext().getApplicationInfo().flags는 어플리케이션의 디버깅 모드 여부를 가져오는 코드이며, 2는 디버깅 모드를 의미한다.
즉, 어플리케이션이 디버깅 모드일 경우 어플리케이션을 종료한다.
c.a(), c.b(), c.c()의 코드는 아래와 같다.
 1
 2
 3
 4
 5
 6
 7
 8
 9
10
11
12
13
14
15
16
17
18
19
20
21
22
23
24
25
26
27
28
29
|
package sg.vantagepoint.a;

import android.os.Build;
import java.io.File;

public class c {
    public static boolean a() {
        for (String file : System.getenv("PATH").split(":")) {
            if (new File(file, "su").exists()) {
                return true;
            }
        }
        return false;
    }

    public static boolean b() {
        String str = Build.TAGS;
        return str != null && str.contains("test-keys");
    }

    public static boolean c() {
        for (String file : new String[]{"/system/app/Superuser.apk", "/system/xbin/daemonsu", "/system/etc/init.d/99SuperSUDaemon", "/system/bin/.ext/.su", "/system/etc/.has_su_daemon", "/system/etc/.installed_su_daemon", "/dev/com.koushikdutta.superuser.daemon/"}) {
            if (new File(file).exists()) {
                return true;
            }
        }
        return false;
    }
}
|
위의 코드는 기기의 루팅 여부를 확인하는 코드이다.
기기가 루팅이 되어있을 경우 어플리케이션을 종료하기 때문에 Frida를 사용하여 루팅 탐지 우회를 해야한다.
루팅 탐지 우회를 위한 Frida 코드는 아래와 같다.
 1
 2
 3
 4
 5
 6
 7
 8
 9
10
11
12
13
14
15
16
17
18
19
20
21
22
23
24
25
|
import frida, sys

def on_message(message, data):
	print(message)

PACKAGE_NAME = "owasp.mstg.uncrackable1"

jscode = """
console.log("[+] Start Script");

	Java.perform(function() {
		console.log("[+] Hooking System.exit");
		var exitClass = Java.use("java.lang.System");
		exitClass.exit.implementation = function() {
			console.log("[+] System.exit called");
		}
	});
"""

process = frida.get_usb_device(1).attach(PACKAGE_NAME)
script = process.create_script(jscode)
script.on('message', on_message)
print('[+] Running Hook')
script.load()
sys.stdin.read()
|
Frida 사용법은 아래 링크에서 확인할 수 있다.
[Android] Frida 사용 및 Hooking 방법
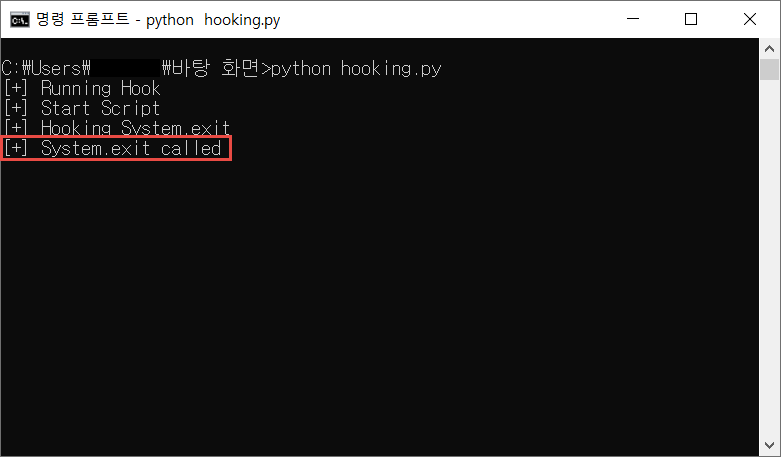
어플리케이션 종료는 알림창의 OK 버튼을 눌러야 실행되므로, 어플리케이션 실행 후 Frida 코드를 실행시키고, OK 버튼을 누르면 우회를 할 수 있다.
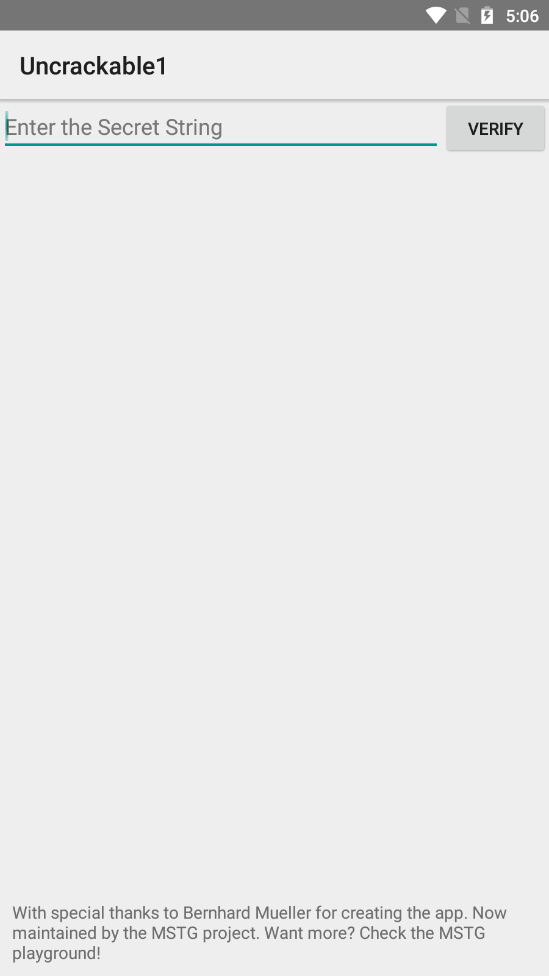
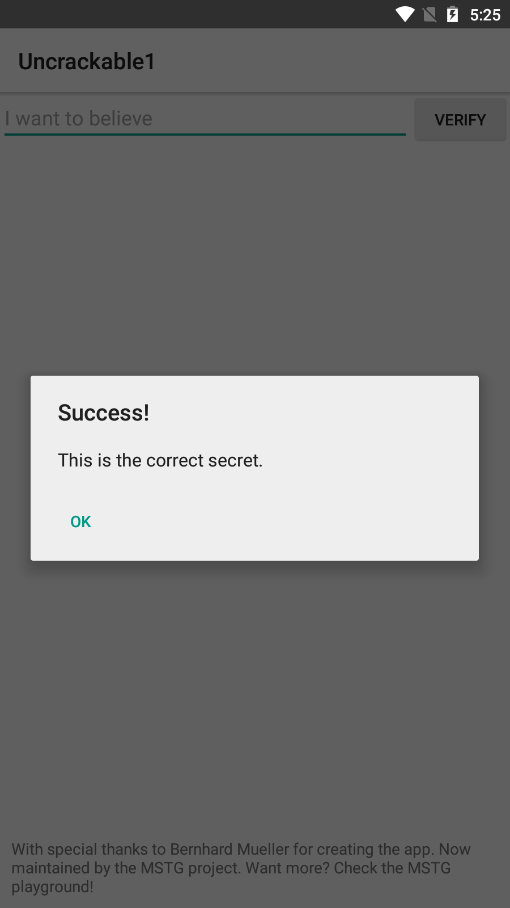
루팅 탐지 우회를 하고 확인 해 보면 어떤 입력 창이 나타난다.
해당 입력창에 값을 입력하면 아래와 같이 알림창이 나타난다.
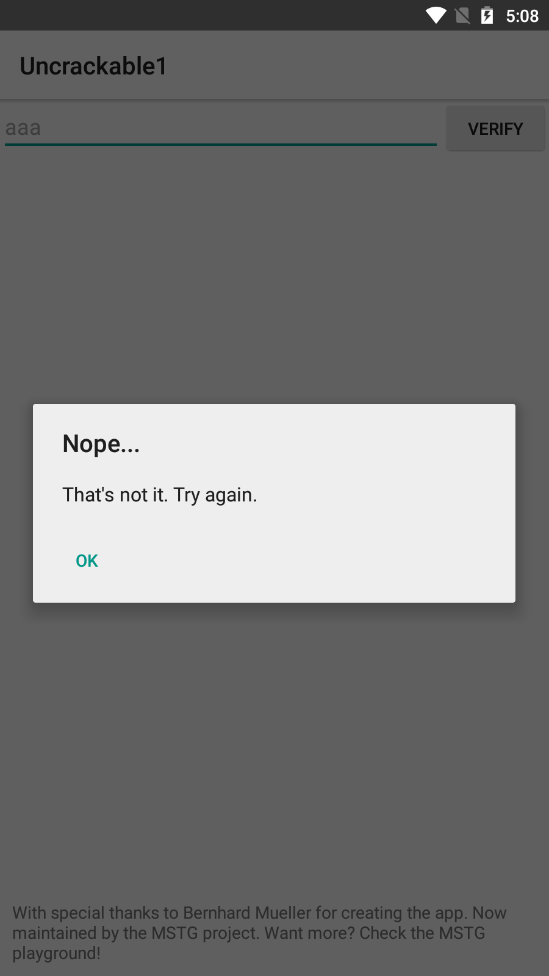
앞서 확인했던 MainActivity의 verify() 메소드가 실행 된 것이다.
 1
 2
 3
 4
 5
 6
 7
 8
 9
10
11
12
13
14
15
16
17
18
19
20
21
|
...

    public void verify(View view) {
        String str;
        String obj = ((EditText) findViewById(R.id.edit_text)).getText().toString();
        AlertDialog create = new AlertDialog.Builder(this).create();
        if (a.a(obj)) {
            create.setTitle("Success!");
            str = "This is the correct secret.";
        } else {
            create.setTitle("Nope...");
            str = "That's not it. Try again.";
        }
        create.setMessage(str);
        create.setButton(-3, "OK", new DialogInterface.OnClickListener() {
            public void onClick(DialogInterface dialogInterface, int i) {
                dialogInterface.dismiss();
            }
        });
        create.show();
    }
|
verify() 메소드는 입력 값을 받은 뒤, 입력받은 값을 인자로 a.a() 메소드를 호출하여 반환값이 참일 경우 Success를 제목으로, This is the correct secret.를 본문으로 하는 알림창을, 반환값이 거짓 일 경우에는 Nope...을 제목으로, That's not it. Try again.를 본문으로 하는 알림창을 띄운다.
즉, Success를 나타나게 하는 어떠한 입력 값을 찾아야 하는 문제이다.
어떻게 비교를 하는지 알기 위해 a.a() 메소드를 확인 해 보았다.
 1
 2
 3
 4
 5
 6
 7
 8
 9
10
11
12
13
14
15
16
17
18
19
20
21
22
23
24
25
26
27
|
package sg.vantagepoint.uncrackable1;

import android.util.Base64;
import android.util.Log;

public class a {
    public static boolean a(String str) {
        byte[] bArr;
        byte[] bArr2 = new byte[0];
        try {
            bArr = sg.vantagepoint.a.a.a(b("8d127684cbc37c17616d806cf50473cc"), Base64.decode("5UJiFctbmgbDoLXmpL12mkno8HT4Lv8dlat8FxR2GOc=", 0));
        } catch (Exception e) {
            Log.d("CodeCheck", "AES error:" + e.getMessage());
            bArr = bArr2;
        }
        return str.equals(new String(bArr));
    }

    public static byte[] b(String str) {
        int length = str.length();
        byte[] bArr = new byte[(length / 2)];
        for (int i = 0; i < length; i += 2) {
            bArr[i / 2] = (byte) ((Character.digit(str.charAt(i), 16) << 4) + Character.digit(str.charAt(i + 1), 16));
        }
        return bArr;
    }
}
|
8d127684cbc37c17616d806cf50473cc를 b() 메소드에 넣은 반환값과 5UJiFctbmgbDoLXmpL12mkno8HT4Lv8dlat8FxR2GOc=를 Base64 Decode한 값을 인자로 sg.vantagepoint.a.a.a() 메소드를 호출하여 bArr에 저장한다.
그 후 아래에서 bArr과 입력한 값을 equals()를 통해 비교한 결과값을 반환한다.
sg.vantagepoint.a.a.a() 메소드는 아래와 같다.
 1
 2
 3
 4
 5
 6
 7
 8
 9
10
11
12
13
|
package sg.vantagepoint.a;

import javax.crypto.Cipher;
import javax.crypto.spec.SecretKeySpec;

public class a {
    public static byte[] a(byte[] bArr, byte[] bArr2) {
        SecretKeySpec secretKeySpec = new SecretKeySpec(bArr, "AES/ECB/PKCS7Padding");
        Cipher instance = Cipher.getInstance("AES");
        instance.init(2, secretKeySpec);
        return instance.doFinal(bArr2);
    }
}
|
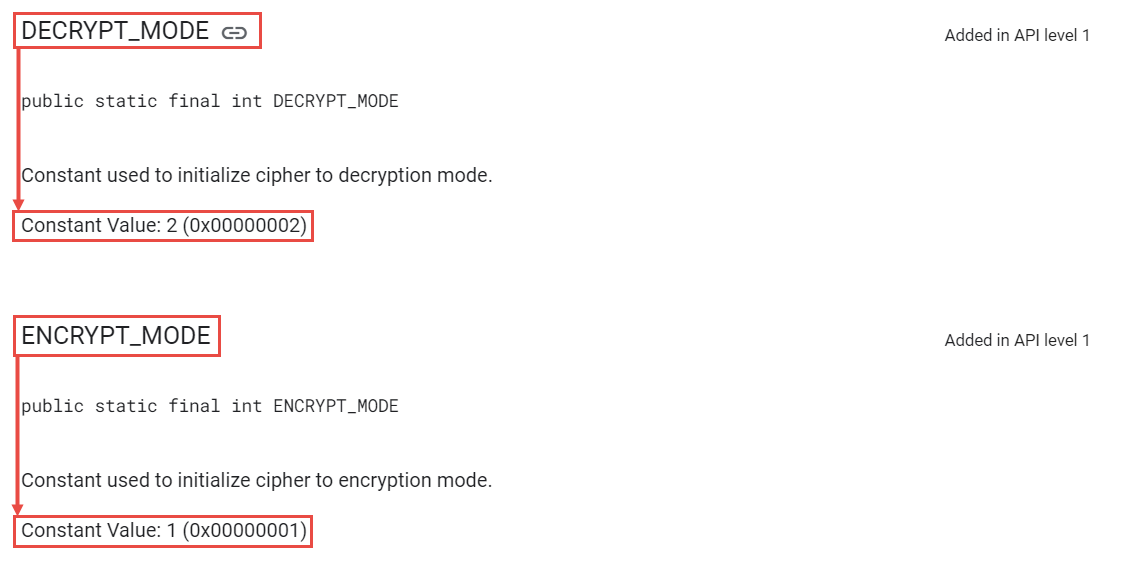
이는 AES Decrypt를 하는 함수이다.(instance.init(2, secretKeySpec)의 2가 DECRYPT_MODE를 의미함)
문제를 풀기 위해서는 Hooking을 통해 반환값을 확인해야 할 것 같다.
나는 두 가지 방법으로 풀었다.
처음에는 equals()를 Hooking 해 값을 확인했으나, 너무 많은 값이 나와 정확한 secret이 무엇인지 알아내기가 힘들었다.
그래서 그 다음에는 sg.vantagepoint.a.a.a()를 Hooking 하여 비교 대상의 값이 무엇인지를 확인했다.
먼저 equals()를 Hooking하는 코드는 아래와 같다.
 1
 2
 3
 4
 5
 6
 7
 8
 9
10
11
12
13
14
15
16
17
18
19
20
21
22
23
24
25
26
27
28
29
30
31
32
33
34
|
import frida, sys

def on_message(message, data):
	print(message)

PACKAGE_NAME = "owasp.mstg.uncrackable1"

jscode = """
console.log("[+] Start Script");

	Java.perform(function() {
		console.log("[+] Hooking System.exit");
		var exitClass = Java.use("java.lang.System");
		exitClass.exit.implementation = function() {
			console.log("[+] System.exit called");
		}
	});

	Java.perform(function() {
		console.log("[+] Hooking str.equals");
		var equalClass = Java.use("java.lang.String");
		equalClass.equals.implementation = function(arg1) {
			console.log(arg1);
			return true;
		}
	});
"""

process = frida.get_usb_device(1).attach(PACKAGE_NAME)
script = process.create_script(jscode)
script.on('message', on_message)
print('[+] Running Hook')
script.load()
sys.stdin.read()
|
위의 코드 실행 결과 아래와 같이 여러 값을 확인할 수 있었다.
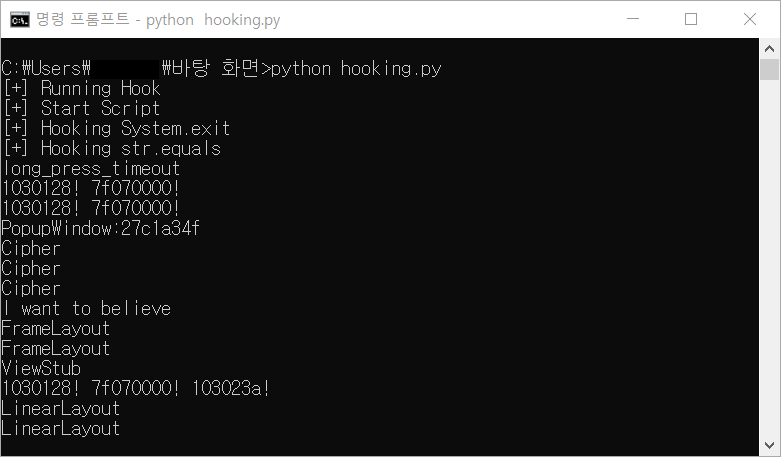
그런데 정확히 어떤 값이 secret인지 알기 힘들어 하나하나 입력 해 보면 되겠지만 이번에는 sg.vantagepoint.a.a.a()를 Hooking하도록 구현했다.
 1
 2
 3
 4
 5
 6
 7
 8
 9
10
11
12
13
14
15
16
17
18
19
20
21
22
23
24
25
26
27
28
29
30
31
32
33
34
35
36
37
38
39
40
41
|
import frida, sys
def on_message(message, data):
print(message)
PACKAGE_NAME = "owasp.mstg.uncrackable1"
jscode = """
console.log("[+] Start Script");
Java.perform(function() {
console.log("[+] Hooking System.exit");
var exitClass = Java.use("java.lang.System");
exitClass.exit.implementation = function() {
console.log("[+] System.exit called");
}
});
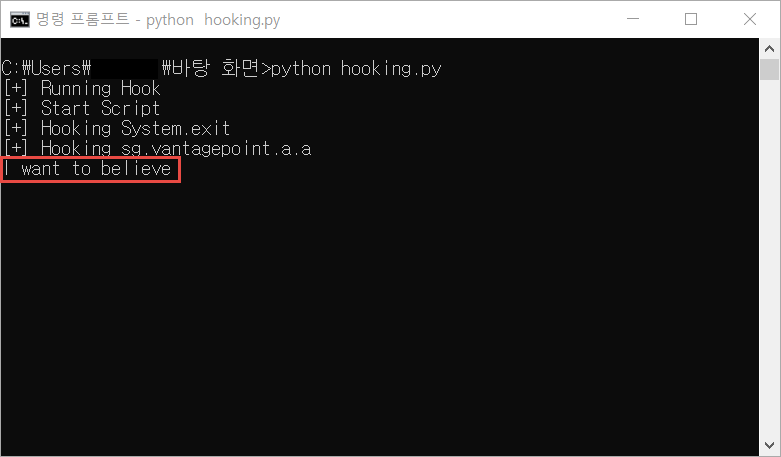
Java.perform(function() {
console.log("[+] Hooking sg.vantagepoint.a.a");
var aClass = Java.use("sg.vantagepoint.a.a");
aClass.a.implementation = function(arg1, arg2) {
var retval = this.a(arg1, arg2);
var flag = "";
for(var i = 0; i < retval.length; i ++) {
flag += String.fromCharCode(retval[i]);
}
console.log(flag);
return retval;
}
});
"""
process = frida.get_usb_device(1).attach(PACKAGE_NAME)
script = process.create_script(jscode)
script.on('message', on_message)
print('[+] Running Hook')
script.load()
sys.stdin.read()
|
위의 코드 실행 결과 아래와 같이 secret값을 확인할 수 있었다.