OWASP Crackme 두 번째 문제인 Uncrackable level 2이다.
jadx-gui로 파일을 열어서 Uncrackable2 패키지의 MainActivity 코드를 확인 해 보면 아래와 같다.
 1
 2
 3
 4
 5
 6
 7
 8
 9
10
11
12
13
14
15
16
17
18
19
20
21
22
23
24
25
26
27
28
29
30
31
32
33
34
35
36
37
38
39
40
41
42
43
44
45
46
47
48
49
50
51
52
53
54
55
56
57
58
59
60
61
62
63
64
65
66
67
68
69
70
71
72
73
74
75
76
77
78
79
80
81
82
83
84
85
86
87
88
|
package sg.vantagepoint.uncrackable2;
import android.app.AlertDialog;
import android.content.DialogInterface;
import android.os.AsyncTask;
import android.os.Bundle;
import android.os.Debug;
import android.os.SystemClock;
import android.support.v7.app.c;
import android.view.View;
import android.widget.EditText;
import owasp.mstg.uncrackable2.R;
import sg.vantagepoint.a.a;
import sg.vantagepoint.a.b;
public class MainActivity extends c {
private CodeCheck m;
static {
System.loadLibrary("foo");
}
/* access modifiers changed from: private */
public void a(String str) {
AlertDialog create = new AlertDialog.Builder(this).create();
create.setTitle(str);
create.setMessage("This is unacceptable. The app is now going to exit.");
create.setButton(-3, "OK", new DialogInterface.OnClickListener() {
public void onClick(DialogInterface dialogInterface, int i) {
System.exit(0);
}
});
create.setCancelable(false);
create.show();
}
private native void init();
/* access modifiers changed from: protected */
public void onCreate(Bundle bundle) {
init();
if (b.a() || b.b() || b.c()) {
a("Root detected!");
}
if (a.a(getApplicationContext())) {
a("App is debuggable!");
}
new AsyncTask<Void, String, String>() {
/* access modifiers changed from: protected */
/* renamed from: a */
public String doInBackground(Void... voidArr) {
while (!Debug.isDebuggerConnected()) {
SystemClock.sleep(100);
}
return null;
}
/* access modifiers changed from: protected */
/* renamed from: a */
public void onPostExecute(String str) {
MainActivity.this.a("Debugger detected!");
}
}.execute(new Void[]{null, null, null});
this.m = new CodeCheck();
super.onCreate(bundle);
setContentView((int) R.layout.activity_main);
}
public void verify(View view) {
String str;
String obj = ((EditText) findViewById(R.id.edit_text)).getText().toString();
AlertDialog create = new AlertDialog.Builder(this).create();
if (this.m.a(obj)) {
create.setTitle("Success!");
str = "This is the correct secret.";
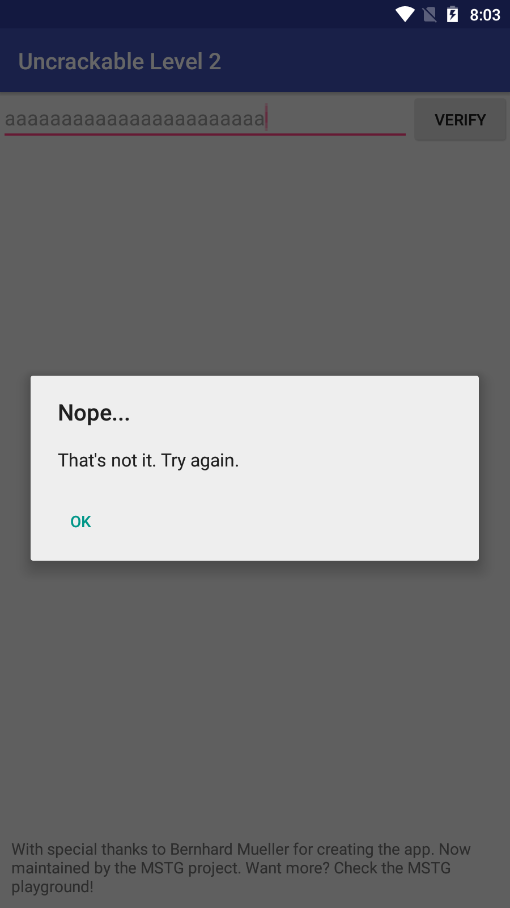
} else {
create.setTitle("Nope...");
str = "That's not it. Try again.";
}
create.setMessage(str);
create.setButton(-3, "OK", new DialogInterface.OnClickListener() {
public void onClick(DialogInterface dialogInterface, int i) {
dialogInterface.dismiss();
}
});
create.show();
}
}
|
전체적인 흐름은 Uncrackable level 1과 비슷하다.
onCreate() 메소드에 아래의 부분이 추가되었는데, 이는 디버거가 연결되어 있을 경우 SystemClock.sleep(100)을 실행시켜 어플리케이션을 중지시키는 코드이다.
 1
 2
 3
 4
 5
 6
 7
 8
 9
10
11
12
13
14
15
|
new AsyncTask<Void, String, String>() {
    /* access modifiers changed from: protected */
    /* renamed from: a */
    public String doInBackground(Void... voidArr) {
        while (!Debug.isDebuggerConnected()) {
            SystemClock.sleep(100);
        }
        return null;
    }
    /* access modifiers changed from: protected */
    /* renamed from: a */
    public void onPostExecute(String str) {
        MainActivity.this.a("Debugger detected!");
    }
}.execute(new Void[]{null, null, null});
|
verify()를 보면 이번에는 this.m.a() 메소드의 결과가 참일 경우 문제를 풀 수 있다.
this.m은 onCreate() 메소드의 하단에 this.m = new CodeCheck();와 같이 선언되어 있다.
CodeCheck() 클래스의 코드는 아래와 같다.
1
2
3
4
5
6
7
8
9
|
package sg.vantagepoint.uncrackable2;

public class CodeCheck {
    private native boolean bar(byte[] bArr);

    public boolean a(String str) {
        return bar(str.getBytes());
    }
}
|
a() 메소드는 입력 한 값을 인자로 bar() 메소드를 호출하는데, 상단을 확인 해 보면 bar() 메소드 앞에 native가 있는 것을 확인할 수 있다.
이는 JNI(Java Native Interface)로, 자바코드에서 다른 언어들로 작성된 라이브러리를 호출하거나 반대로 호출되게 하는 프레임워크이다.
자바 네이티브 인터페이스
Native 메소드를 확인하기 위해서는 사용하는 라이브러리를 확인하고, 해당 라이브러리에서 메소드를 찾으면 된다.
앞서 확인 한 MainActivity의 상단에 라이브러리를 로드하는 부분이 존재한다.
1
2
3
|
static {
    System.loadLibrary("foo");
}
|
foo라는 라이브러리를 로드하는 코드로, 라이브러리를 보기 위해서는 어플리케이션을 디컴파일 해야 한다.
디컴파일 방법은 아래 링크를 참조하면 된다.
[Android] 안드로이드 어플리케이션 디컴파일 및 리패키징
디컴파일을 하면 아래와 같은 폴더를 확인할 수 있는데, 이 중 lib 폴더에서 라이브러리를 찾으면 된다.
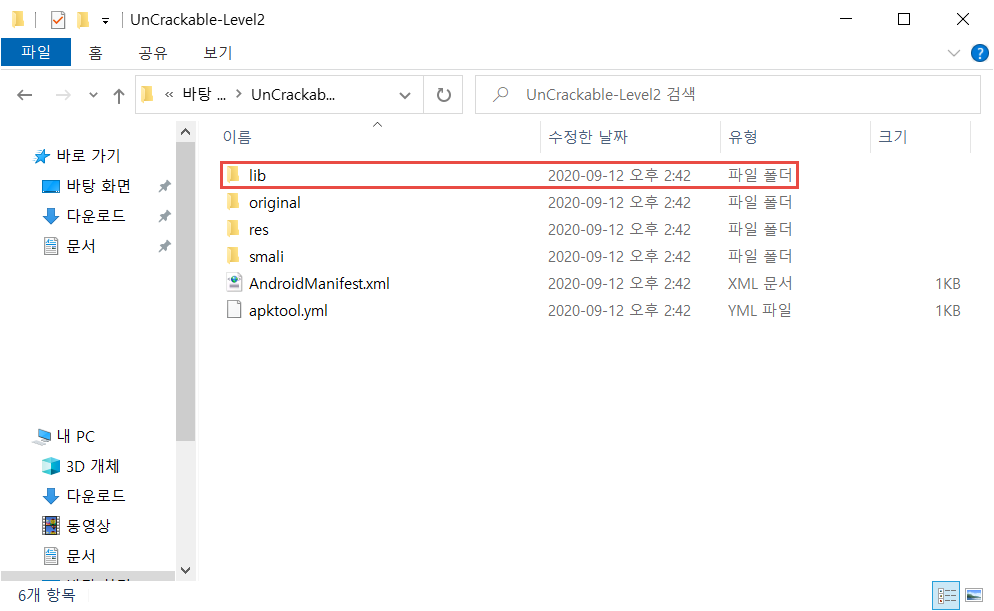
lib 폴더 아래에 각 환경별로 라이브러리가 있을텐데, 이 중 각자 환경에 맞는 폴더에서 라이브러리를 확인하면 된다.
나는 x86 환경이기 때문에 x86 폴더에서 라이브러리를 확인했다.
라이브러리 명은 lib<호출 시 사용한 이름>.so 이다. 이 경우 라이브러리를 호출할 때 foo라는 이름을 사용했으므로, 라이브러리의 실제 이름은 libfoo.so가 된다.
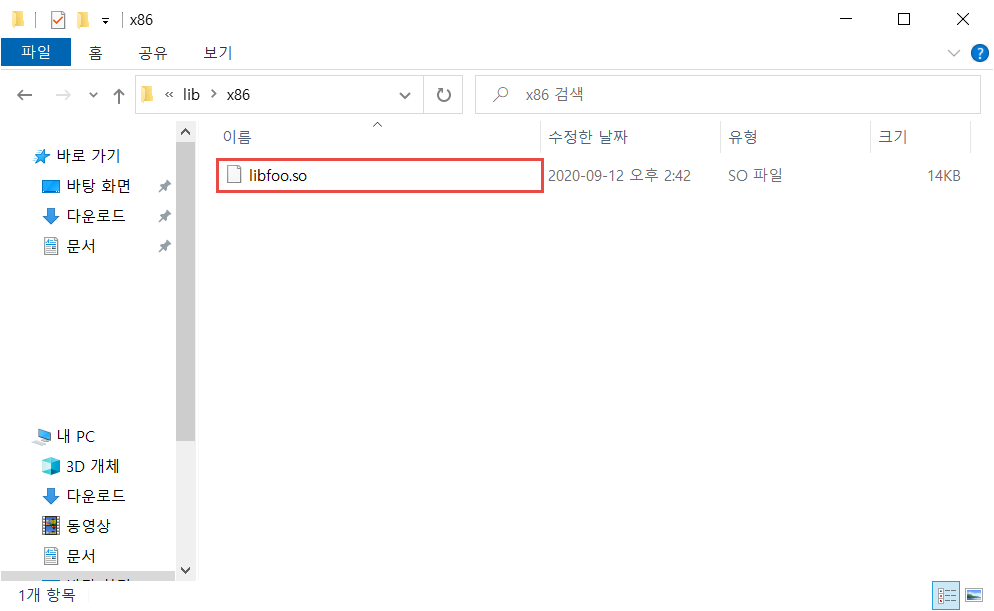
libfoo.so 파일이 있는 것을 확인할 수 있다.
라이브러리 파일은 IDA를 사용하여 분석해야 한다.
IDA를 사용 해 파일을 열어보면 여러 함수들이 존재하는데, 이 중 호출한 함수 명을 찾으면 된다.
함수명 앞에 Java가 붙고 뒤에 패키지명과 클래스 명, 함수명이 차례로 나온다.
때문에 bar 함수는 Java_sg_vantagepoint_uncrackable2_CodeCheck_bar로 되어있으며, 코드는 아래와 같다.
 1
 2
 3
 4
 5
 6
 7
 8
 9
10
11
12
13
14
15
16
17
18
19
20
21
22
23
24
25
26
27
28
29
30
31
32
33
|
signed int __cdecl Java_sg_vantagepoint_uncrackable2_CodeCheck_bar(int a1, int a2, int a3)
{
  const char *v3; // esi
  signed int result; // eax
  int s2; // [esp+0h] [ebp-2Ch]
  int v6; // [esp+4h] [ebp-28h]
  int v7; // [esp+8h] [ebp-24h]
  int v8; // [esp+Ch] [ebp-20h]
  __int16 v9; // [esp+10h] [ebp-1Ch]
  int v10; // [esp+12h] [ebp-1Ah]
  __int16 v11; // [esp+16h] [ebp-16h]
  unsigned int v12; // [esp+18h] [ebp-14h]

  v12 = __readgsdword(0x14u);
  if ( byte_4008 != 1 )
    goto LABEL_9;
  s2 = 1851877460;
  v6 = 1713402731;
  v7 = 1629516399;
  v8 = 1948281964;
  v9 = 25960;
  v10 = 1936287264;
  v11 = 104;
  v3 = (const char *)(*(int (__cdecl **)(int, int, _DWORD))(*(_DWORD *)a1 + 736))(a1, a3, 0);
  if ( (*(int (__cdecl **)(int, int))(*(_DWORD *)a1 + 684))(a1, a3) != 23 )
    goto LABEL_9;
  if ( !strncmp(v3, (const char *)&s2, 0x17u) )
    result = 1;
  else
LABEL_9:
    result = 0;
  return result;
}
|
입력받은 값과 라이브러리에 선언되어 있는 값을 strncmp로 비교하며, 그 두 값이 같을 때 1을 반환 해 준다.
0x17은 10진수로 23이므로, secret의 글자 수는 23글자라는 것을 알 수 있다.
비교 대상인 s2 ~ v11 변수에 선언되어 있는 값을 char로 변경하면 각각 아래와 같다.
1
2
3
4
5
6
7
|
  s2 = 'nahT';
  v6 = 'f sk';
  v7 = 'a ro';
  v8 = 't ll';
  v9 = 'eh';
  v10 = 'sif ';
  v11 = 'h';
|
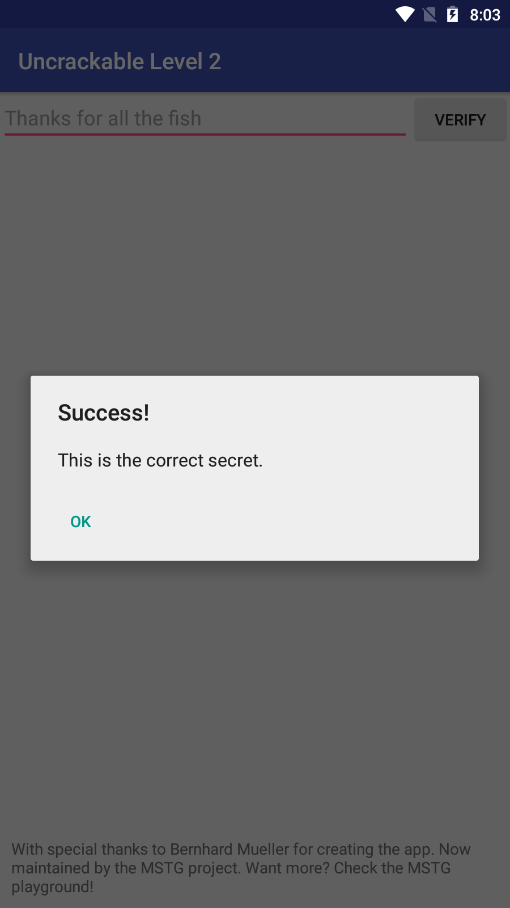
이를 쭉 연결 해 보면 Thanks for all the fish인데, 사실 이 값이 secret이다. ㅎㅎ
그런데 나는 native 메소드를 Hooking 하는 방법을 알고 싶은 것이라 Frida를 사용하여 문제를 풀어보려 한다.
비교 대상인 값을 찾기 위해서는 strncmp를 Hooking하는 것이 편하다.
코드는 아래와 같다.
 1
 2
 3
 4
 5
 6
 7
 8
 9
10
11
12
13
14
15
16
17
18
19
20
21
22
23
24
25
26
27
28
29
30
31
32
33
|
import frida, sys

def on_message(message, data):
	print(message)

PACKAGE_NAME = "owasp.mstg.uncrackable2"

jscode = """
console.log("[+] Start Script");

	Java.perform(function() {
		console.log("[+] Hooking System.exit");
		var exitClass = Java.use("java.lang.System");
		exitClass.exit.implementation = function() {
			console.log("[+] System.exit called");
		}
	});

	Interceptor.attach (Module.findExportByName ("libfoo.so", "strncmp"), {
		onEnter: function (args) {
			if(args[2].toInt32() == 23) {
				console.log(Memory.readUtf8String(args[1], 23));
			}
		}
	});
"""

process = frida.get_usb_device(1).attach(PACKAGE_NAME)
script = process.create_script(jscode)
script.on('message', on_message)
print('[+] Running Hook')
script.load()
sys.stdin.read()
|
루팅 탐지 로직이 있으므로, System.exit()를 Hooking하여 어플리케이션이 종료되지 않도록 해야한다.
bar() 함수를 후킹하는 코드는 아래와 같다.
1
2
3
4
5
6
7
|
	Interceptor.attach (Module.findExportByName ("libfoo.so", "strncmp"), {
		onEnter: function (args) {
			if(args[2].toInt32() == 23) {
				console.log(Memory.readUtf8String(args[1], 23));
			}
		}
	});
|
libfoo.so 라이브러리의 strncmp 함수를 Hooking하는 코드이며, 만약 bar 함수를 Hooking해야 할 경우 함수의 전체 명(IDA에서 나오는 전체 함수명)인 Java_sg_vantagepoint_uncrackable2_CodeCheck_bar를 입력 해 주어야 한다.
if(args[2].toInt32() == 23)는 strncmp를 Hooking할 경우 너무 많은 결과값이 나와서 bar 함수에서 호출될 때만 인자를 확인하려 넣은 조건문이다.
때문에 23글자를 입력해야 bar 함수에서 호출 한 strncmp 함수의 인자를 확인할 수 있다.
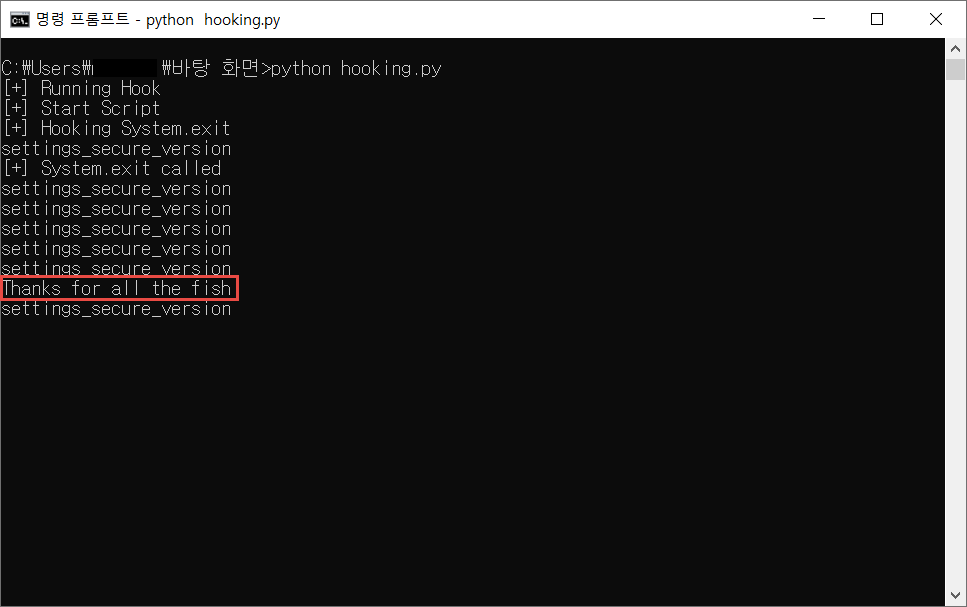
결과로 나온 값을 입력하면 Success를 확인할 수 있다.