Frida는 Python 기반의 라이브러리로 Native App을 Hooking 하여 어플리케이션을 분석할 수 있게 해 주는 툴이다.
JS Injection을 이용하며, Android와 iOS에 많이 사용하지만 Windows나 MacOS, Linux 등 다른 플랫폼에서도 사용할 수 있다고 한다.
Frida를 사용하기 위해서는 frida-server를 안드로이드 기기에서 실행해야 한다.
frida-server를 안드로이드 기기에 넣을때는 adb를 사용한다.
나는 Nox Player를 사용했는데, Nox Player를 설치하면 설치 경로에 자동으로 adb도 설치되어 있다.
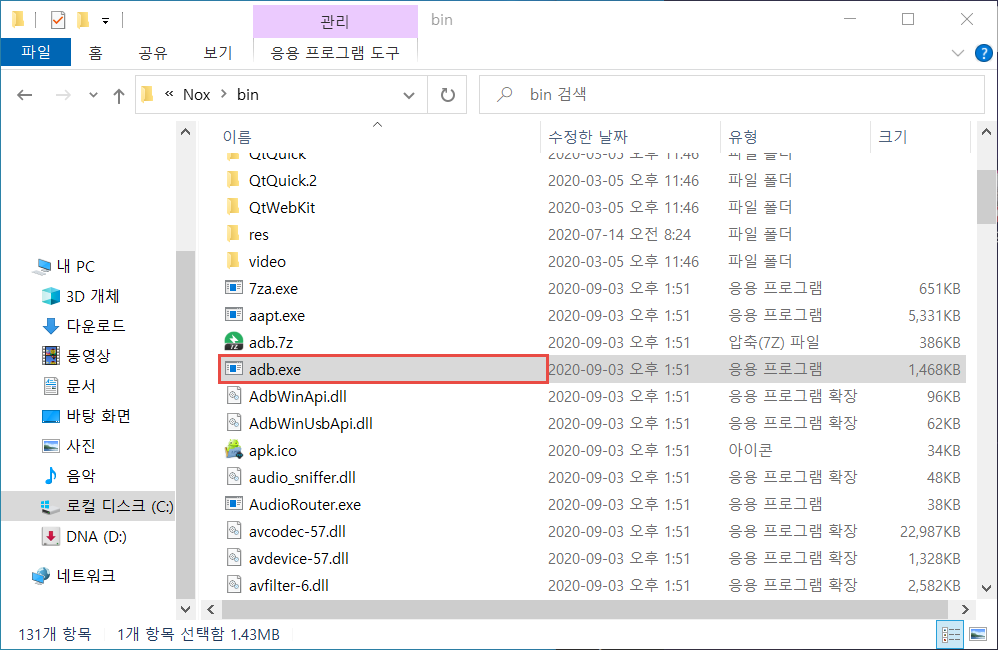
내 경우, 설치 경로는 C:\Program Files\Nox\bin 였다.
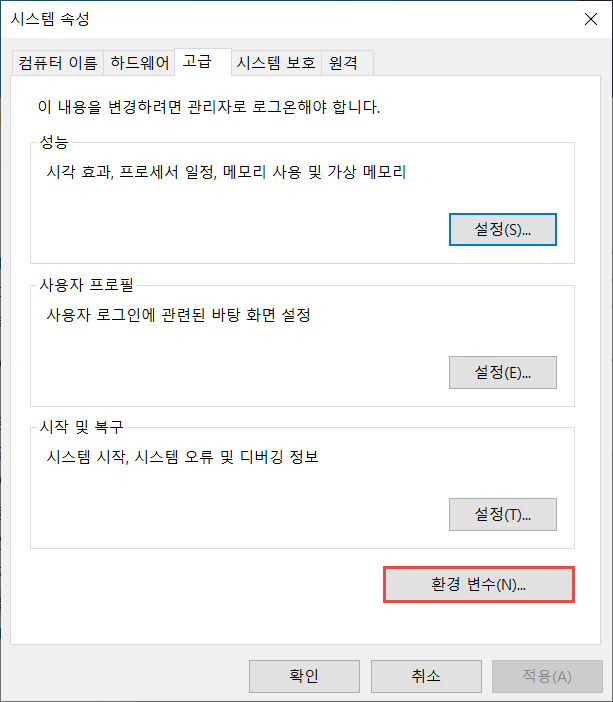
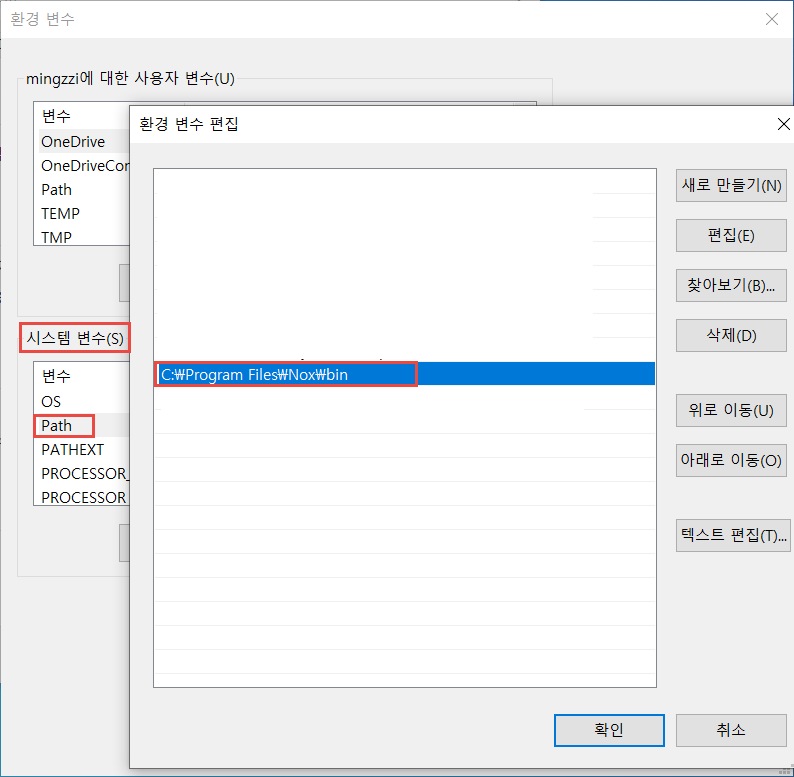
이 경로를 시스템 환경 변수 > 환경 변수 > Path에 아래와 같이 저장 해 두면 아무 경로에서나 adb를 실행시킬 수 있다.
cmd창을 열어서 adb를 입력했을 때 아래와 같이 출력되면 adb를 실행시킬 수 있다.

frida-server는 아래 링크에서 다운받을 수 있다.
Frida Github
링크 접속 후 frida-server로 검색하면 여러 파일이 나온다.
이 중 자신의 기기 환경에 맞는 파일을 다운받으면 된다.
안드로이드 에뮬레이터의 비트는 cmd 창에서 adb shell을 통해 기기에 접속 후 아래의 명령어를 입력하여 확인할 수 있다.
1
2
3
| > adb shell
root@shamu:/ # getprop ro.product.cpu.abi
x86
|
내 경우 에뮬레이터의 비트는 x86 이어서 frida-server-12.11.12-android-x86.xz를 다운받았다.
다운받은 파일 압축을 풀고 adb push를 사용하여 기기에 넣어주면 된다.(나는 편의상 이름을 변경했다.)
1
| > adb push [local_file_path] [remote_directory_to_push_file]
|
1
2
3
4
5
6
7
| > adb push ./frida-server /data/local/tmp/
[100%] /data/local/tmp/frida-server
> adb shell
root@shamu:/ # cd /data/local/tmp
root@shamu:/data/local/tmp # ls -al
-rw-rw-rw- root root 28213476 2020-09-09 17:17 frida-server
|
파일 전송 후 해당 경로를 확인 해 보면 frida-server 파일에 실행 권한이 없다.
때문에 chmod를 이용하여 실행 권한을 부여 해 주어야 한다.
1
2
3
| root@shamu:/data/local/tmp # chmod 777 frida-server
root@shamu:/data/local/tmp # ls -al
-rwxrwxrwx root root 28213476 2020-09-09 17:17 frida-server
|
이제 기기에서는 frida-server를 실행만 해 주면 된다.
1
2
3
4
| root@shamu:/data/local/tmp # ./frida-server &
[1] 5482
root@shamu:/data/local/tmp # ps | grep frida
root 5482 5472 92868 48516 ffffffff b5bc9950 S ./frida-server
|
나는 백그라운드에서 실행시키기 위해 &를 붙여주었다.
이제 frida 사용을 위한 코드를 구현해야 한다.
코드는 Python으로 구현하며, 사용하기 위해서는 pip를 이용하여 frida-tools를 설치해야 한다.
1
| > pip install frida-tools
|
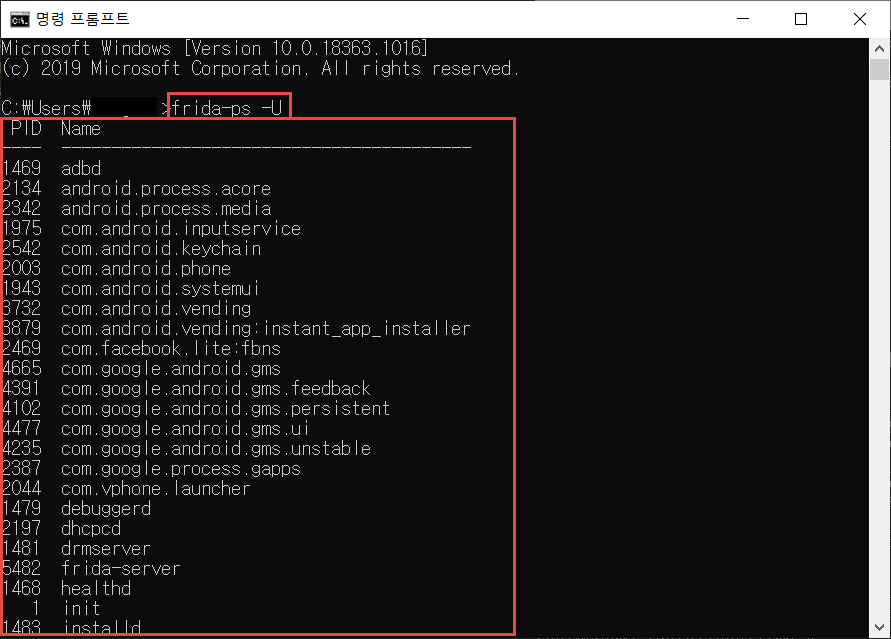
설치 후 frida-server가 실행중인 상태에서 frida-ps -U를 입력했을 때 아래와 같이 출력된다면 정상적으로 설치가 된 것이다.
Hooking을 위한 코드의 기본 틀은 아래와 같다.
 1
 2
 3
 4
 5
 6
 7
 8
 9
10
11
12
13
14
15
16
17
18
19
20
21
22
23
24
25
26
| import frida, sys
def on_message(message, data):
print(message)
# Hooking 할 어플리케이션의 package 명
PACKAGE_NAME = "owasp.mstg.uncrackable1"
jscode = """
console.log("[+] Start Script");
Java.perform(function() {
console.log("[+] Hooking System.exit");
var exitClass = Java.use("java.lang.System");
exitClass.exit.implementation = function() {
console.log("[+] System.exit called");
}
});
"""
process = frida.get_usb_device(1).attach(PACKAGE_NAME)
script = process.create_script(jscode)
script.on('message', on_message)
print('[+] Running Hook')
script.load()
sys.stdin.read()
|
먼저 Hooking 할 어플리케이션의 package 명은 아래 명령어로 확인할 수 있다.
PACKAGE_NAME에는 위의 명령어로 확인한 package 명을 넣어주면 된다.
Hooking할 메소드를 설정하는 부분은 아래와 같다.
 1
 2
 3
 4
 5
 6
 7
 8
 9
10
11
| console.log("[+] Start Script");
Java.perform(function() {
console.log("[+] Hooking System.exit");
//Hooking 할 메소드의 class 명
var exitClass = Java.use("java.lang.System");
//class명.method명.implementation = funtion(argv[])
exitClass.exit.implementation = function() {
console.log("[+] System.exit called");
}
});
|
위의 코드는 java.lang.System 클래스의 exit 메소드가 호출 될 경우 [+] System.exit called를 출력한다.
즉, System.exit가 호출 될 경우 해당 메소드가 Hooking되며, 어플리케이션이 종료되지 않고 넘어갈 수 있다.