최근 토이 프로젝트로 아주아주 간단한 어플을 개발하기로 했다.
뭘로 개발을 해야할까 고민하다가 그냥 안드로이드랑 iOS로 둘 다 빌드가 가능한 React-Native로 결정했다.
먼저 오늘은 환경 세팅만 하려 한다.
1. Node.js 설치
React-Native로 개발을 하기 위해서는 Node.js가 설치되어 있어야 한다.
https://nodejs.org/en/download/
위의 사이트에서 가장 최신버전을 설치하면 된다.
다 설치가 되면 cmd에서 node -v, npm -v를 입력하여 설치가 잘 됬는지 확인할 수 있다.
1
2
3
4
5
|
> node -v
v14.16.1

> npm -v
6.14.12
|
2. Chocolatey 설치
이제 react-native 관련 파일들을 설정해야 하는데, Windows에서는 명령어를 실행시키기가 쉽지 않다.
그런데 chocolatey를 사용하면 리눅스처럼 명령어를 사용하여 쉽게 관련 패키지들을 설치할 수 있다.
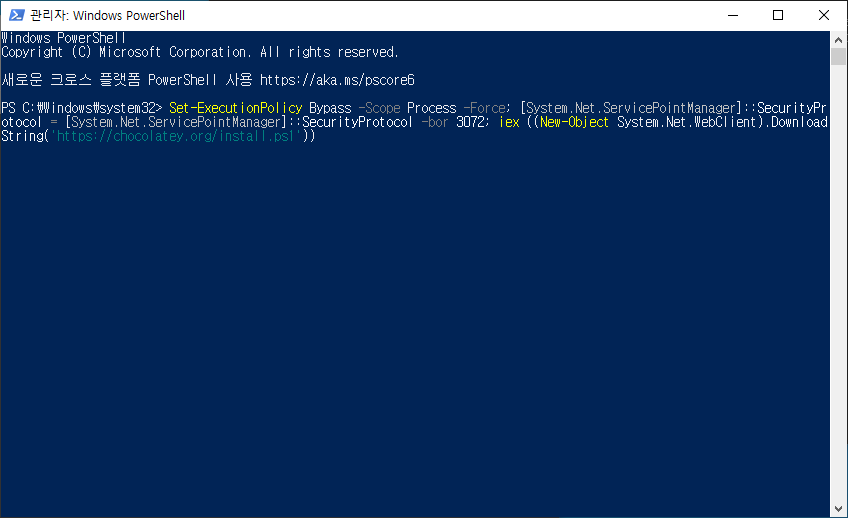
chocolatey를 설치하기 위해서는 Powershell을 실행 시키고 아래의 명령어를 실행시키면 된다.
만약 오류가 날 경우 Powershell을 관리자 권한으로 실행시키면 되며, cmd에서는 설치 및 choco 명령어 사용이 불가능하기 때문에 꼭 Powershell을 사용해야 하는 것 같다.
1
|
> Set-ExecutionPolicy Bypass -Scope Process -Force; [System.Net.ServicePointManager]::SecurityProtocol = [System.Net.ServicePointManager]::SecurityProtocol -bor 3072; iex ((New-Object System.Net.WebClient).DownloadString('https://chocolatey.org/install.ps1'))
|
설치 완료 후 아래와 같이 입력했을 때 가장 마지막에 버전이 출력되면 설치가 완료 된 것이다.
1
2
3
4
5
6
7
8
|
> choco -version
Parsing -version resulted in error (converted to warning):
 Cannot bundle unregistered option '-e'.
This is a listing of all of the different things you can pass to choco.

...

Chocolatey v0.10.15
|
3. React Native CLI 설치
이제 앱 개발을 위해 필요한 React Native CLI 설치를 해야하는데, 이는 아래의 명령어를 통해 설치할 수 있다.
1
|
> npm install -g react-native-cli
|
마찬가지로 설치가 완료된 후 아래의 명령어 실행 시 버전이 출력된다면 설치가 완료 된 것이다.
1
2
3
|
> react-native --version
react-native-cli: 2.0.1
react-native: n/a - not inside a React Native project directory
|
4. JDK 설치
이번에는 JDK8 이다.
안드로이드 앱을 개발하기 위해 필요한데, 인터넷에서 다운받으려면 Oracle 로그인이 필요하다.
그런데 Chocolatey를 사용하여 아래의 명령어를 Powershell에서 실행하면 로그인 없이 다운로드 받을 수 있다.
 1
 2
 3
 4
 5
 6
 7
 8
 9
10
11
12
13
14
15
16
17
18
19
20
21
|
> choco install -y jdk8
Chocolatey v0.10.15
Installing the following packages:
jdk8
By installing you accept licenses for the packages.
Progress: Downloading jdk8 8.0.211... 100%

jdk8 v8.0.211 [Approved]
jdk8 package files install completed. Performing other installation steps.
Downloading JDK from https://javadl.oracle.com/webapps/download/GetFile/1.8.0_211-b12/478a62b7d4e34b78b671c754eaaf38ab/windows-i586/jdk-8u211-windows-x64.exe
Installing jdk8...
jdk8 has been installed.
PATH environment variable does not have C:\Program Files\Java\jdk1.8.0_211\bin in it. Adding...
  jdk8 may be able to be automatically uninstalled.
Environment Vars (like PATH) have changed. Close/reopen your shell to
 see the changes (or in powershell/cmd.exe just type `refreshenv`).
 The install of jdk8 was successful.
  Software installed to 'C:\Program Files\Java\jdk1.8.0_211\'

Chocolatey installed 1/1 packages.
 See the log for details (C:\ProgramData\chocolatey\logs\chocolatey.log).
|
설치가 완료 된 후에는 Powershell을 재실행 해야 한다.
재실행 후 아래의 명령어 입력 시 버전이 나온다면 설치가 완료 된 것이다.
1
2
3
4
|
> java -version
java version "1.8.0_211"
Java(TM) SE Runtime Environment (build 1.8.0_211-b12)
Java HotSpot(TM) 64-Bit Server VM (build 25.211-b12, mixed mode)
|
1
2
|
> javac -version
javac 1.8.0_211
|
5. Android Studio 설치
Android Studio는 아래의 사이트에서 다운받을 수 있다.
Android Studio 다운로드
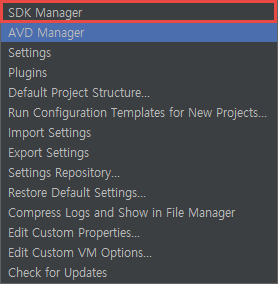
다운로드 완료 시 아래와 같은 화면이 나올텐데, 여기에서 Configure > SDK Manager를 선택하여 SDK를 설치해야 한다.

SDK Manager에서 오른쪽 하단의 Show Package Details를 선택하고, 표시한 항목을 설치한다.
내 경우 Android 10.0 버전에서 개발 할 예정이라 Android 10.0의 항목들을 설치했다.
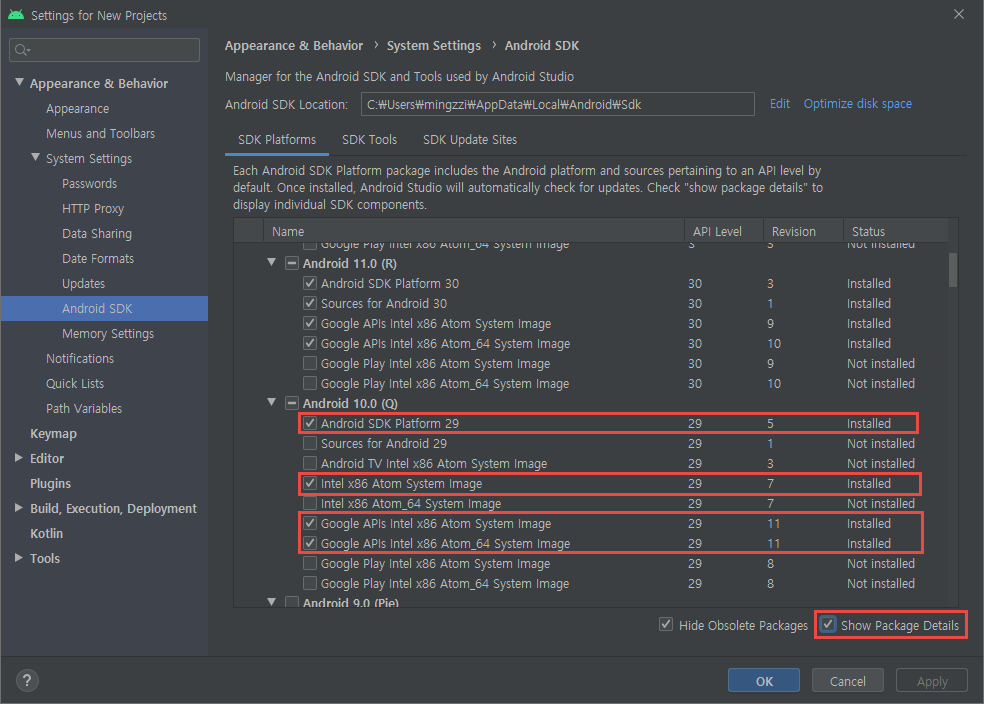
아래의 OK 클릭 후 새 창이 뜨면 Accept를 선택하여 설치하면 된다.
6. 환경변수 등록
이번에는 환경변수를 등록해야 한다.
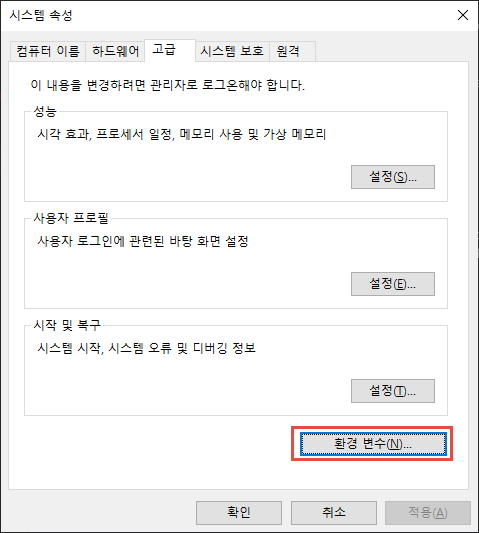
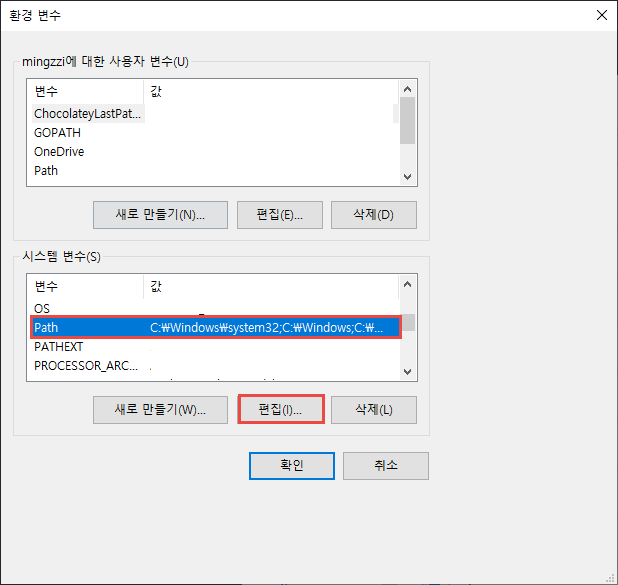
먼저 시작 메뉴에서 시스템 환경 변수 편집을 선택하여 아래와 같이 오른쪽 아래에 환경 변수를 선택한다.
아래의 시스템 변수 > Path를 선택한 후 편집 버튼을 클릭한다.
Path에서 SDK 경로 아래의 platform-tools의 경로를 입력 해 준다.
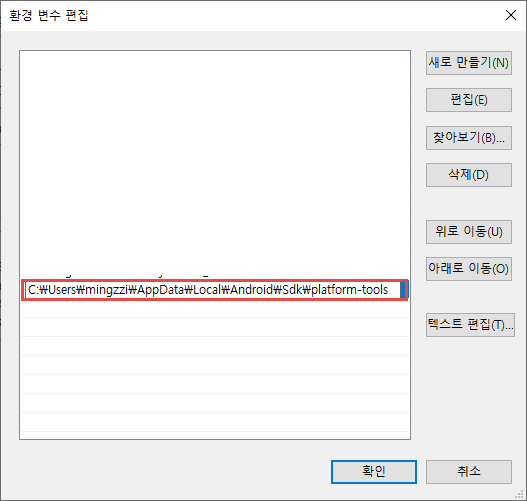
기본적으로는 아래의 경로지만, 만약 해당 경로에 없을 경우 앞서 사용한 SDK Manager 상단의 Andrpod SDK Location 내 경로를 확인 해 보면 된다.
1
|
C:\Users\USERNAME\AppData\Local\Android\Sdk\platform-tools
|
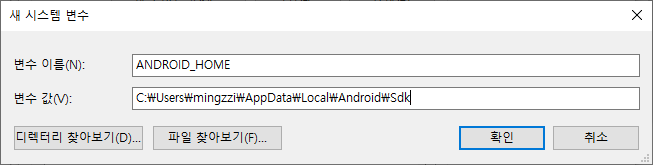
이번에는 다시 환경 변수 탭으로 돌아 가 편집 왼쪽의 새로 만들기를 선택하고 아래와 같이 변수 명은 ANDROID_HOME, 값은 SDK의 경로를 넣어 준다.
모두 등록 후 cmd를 실행 시켜 adb를 입력 했을 때 아래와 같이 출력된다면 환경변수가 제대로 등록 된 것이다.
1
2
3
4
|
> adb
Android Debug Bridge version 1.0.41
Version 31.0.2-7242960
Installed as C:\Users\mingzzi\AppData\Local\Android\Sdk\platform-tools\adb.exe
|
만약에 안된다면 컴퓨터 재부팅을 할 경우 되는 경우도 있으니 재부팅을 추천한다.
7. AVD 실행 테스트
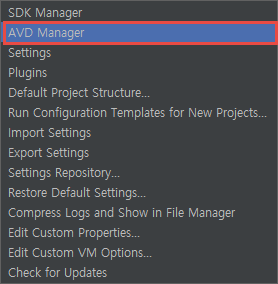
이번에는 앞서 Android Studio 설치 후 AVD Manager를 선택하여 애뮬레이터가 제대로 실행되는지 확인 해 본다.
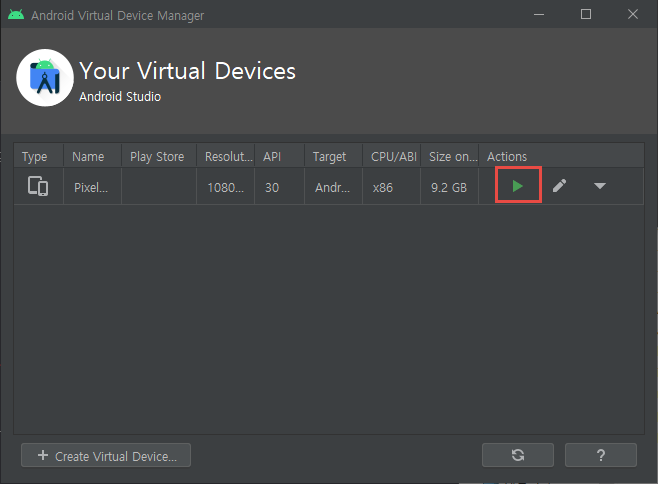
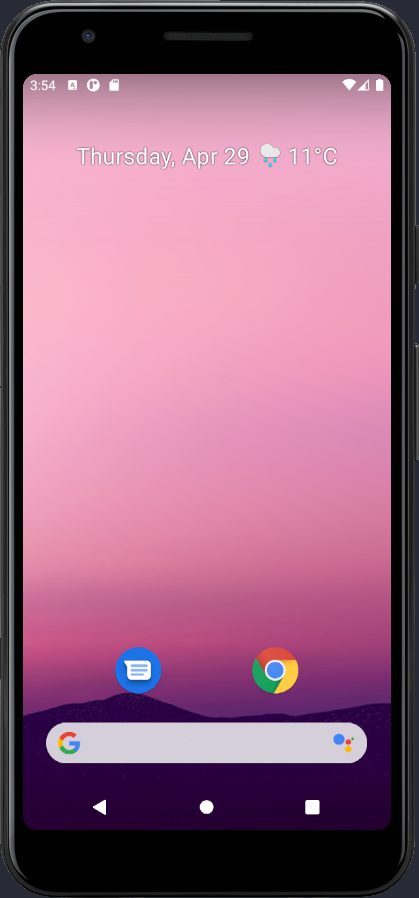
Android Studio 메인 페이지에서 Configure > AVD Manager를 선택한다.
기본적으로 애뮬레이터가 하나 뜰텐데, 이 중 실행 버튼을 클릭하여 아래와 같이 실행되면 된다.
8. 프로젝트 생성
이제 react-native 프로젝트를 실행하기 위한 모든 준비가 완료됬다.
프로젝트를 생성 할 경로로 가 cmd 창에서 아래와 같이 입력한다.
이 때는 cmd를 관리자 권한으로 실행시킨 후 명령어를 입력해야 한다.
1
|
> react-native init testApp
|
명령어 실행이 완료되면 마지막에 아래와 같이 출력 될 것이다.
1
2
3
4
5
6
|
  Run instructions for Android:
    • Have an Android emulator running (quickest way to get started), or a device connected.
    • cd "C:\Users\mingzzi\testApp" && npx react-native run-android

  Run instructions for Windows:
    • See https://aka.ms/ReactNativeGuideWindows for the latest up-to-date instructions.
|
그럼 출력 된 것과 같이 프로젝트 경로로 들어간 후 npx react-native run-android를 실행한다.
1
2
|
> cd testApp
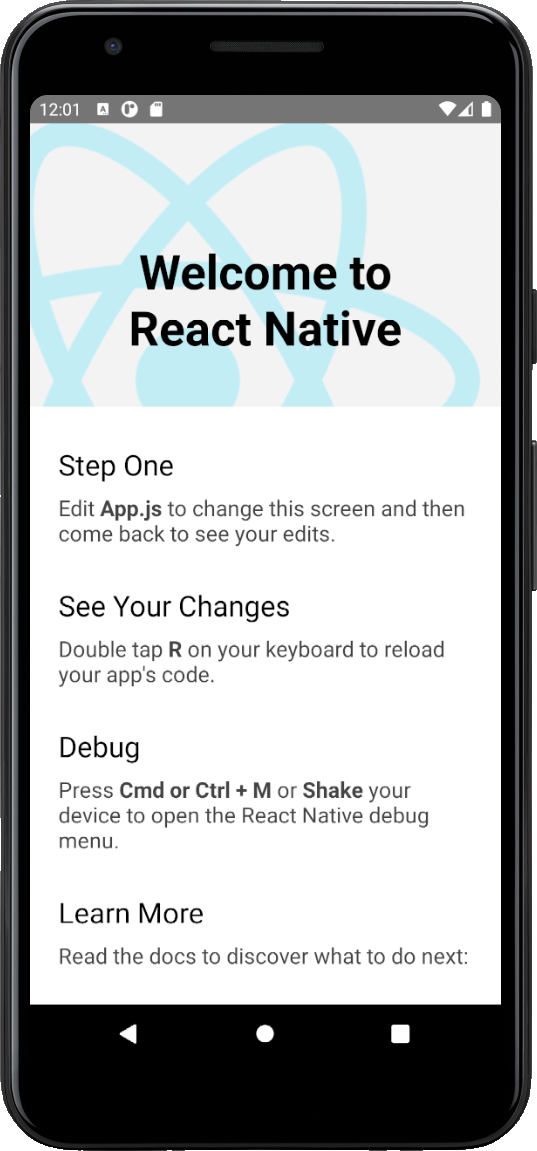
> npx react-native run-android
|
그 결과 아래와 같이 앱이 정상적으로 실행 된 것을 확인할 수 있다.
9. Hello World 출력하기
코드를 수정하기 위해서는 프로젝트 폴더 내의 App.js를 수정해야 한다.
App.js 파일을 열면 아래와 같은 부분이 있는데, 나는 여기에서 Hello World를 출력하기 위해 중간에 아래의 코드를 추가 해 주었다.
1
2
3
|
          <Section title="Hello World">
            Hello Everyone~!
          </Section>
|
 1
 2
 3
 4
 5
 6
 7
 8
 9
10
11
12
13
14
15
16
17
18
19
20
21
22
23
24
25
26
27
28
29
30
31
32
33
34
35
36
37
38
39
40
|
const App: () => Node = () => {
  const isDarkMode = useColorScheme() === 'dark';

  const backgroundStyle = {
    backgroundColor: isDarkMode ? Colors.darker : Colors.lighter,
  };

  return (
    <SafeAreaView style={backgroundStyle}>
      <StatusBar barStyle={isDarkMode ? 'light-content' : 'dark-content'} />
      <ScrollView
        contentInsetAdjustmentBehavior="automatic"
        style={backgroundStyle}>
        <Header />
        <View
          style={{
            backgroundColor: isDarkMode ? Colors.black : Colors.white,
          }}>
          <Section title="Hello World">
            Hello Everyone~!
          </Section>
          <Section title="Step One">
            Edit <Text style={styles.highlight}>App.js</Text> to change this
            screen and then come back to see your edits.
          </Section>
          <Section title="See Your Changes">
            <ReloadInstructions />
          </Section>
          <Section title="Debug">
            <DebugInstructions />
          </Section>
          <Section title="Learn More">
            Read the docs to discover what to do next:
          </Section>
          <LearnMoreLinks />
        </View>
      </ScrollView>
    </SafeAreaView>
  );
};
|
그럼 아래와 같이 앱이 변경 된 것을 확인할 수 있다.
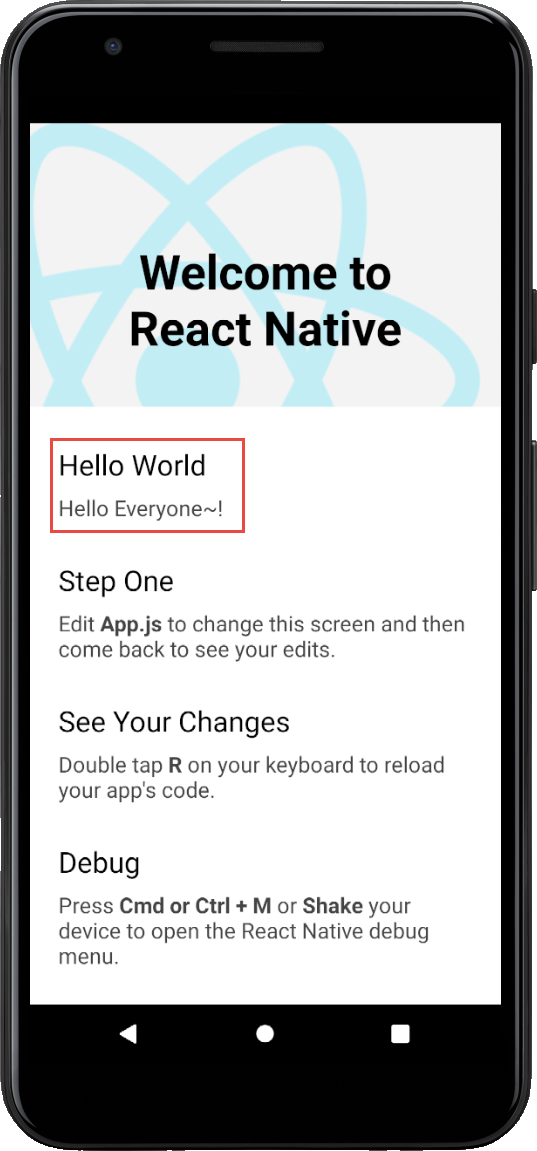
이와 같은 방법으로 앱을 수정하여 개발을 하면 된다.