공부해야지 공부해야지 다짐만 하다가 드디어 시작힌 Terraform 공부다.
현생이 너무 바빠 이제서야 시작했지만, 튜토리얼부터 차근차근 해보려 한다.
Terraform 이란, Hashicorp 라는 곳에서 오픈소스로 개발 중인 IaC(Infrastructure as Code) 도구이다.
IaC 라는 개념이 생소 할 수도 있는데 단순하게 설명하자면, 예를 들어 AWS에서 특정 사양의 인스턴스를 1개만 생성 할 경우에는 AWS Console에서 버튼을 하나하나 클릭하며 생성해도 얼마 걸리지 않는다.
하지만 인스턴스를 100개 혹은 1000개를 생성해야 한다면? AWS Console에서 하기에는 쉽지 않은 작업이 될 것이다.
이 때 사용하는게 IaC 이다. 인프라를 관리하기 위한 코드를 구현하고, 해당 코드를 실행시켜 클라우드 인스턴스를 생성하는 등의 작업을 할 수 있다.
각 클라우드 서비스에는 IaC 기능이 각자 있겠지만, Terraform은 AWS, Azure, GCP 등 대부분의 클라우드 서비스에서 동일하게 사용할 수 있다.
또한 plan 이 후 apply를 하기 때문에 plan을 통해 먼저 내가 구현한 코드를 실행했을 때 어떠한 결과가 나올 지를 확인하고 apply를 통해 반영할 수 있다.
더 자세한 설명은 Terraform 공식 홈페이지에서 확인하면 된다.
먼저 내가 참고한 튜토리얼 과정은 여기에서 확인할 수 있다.
참고로 AWS 기준이며, 다른 클라우드 서비스를 사용 할 경우 그에 맞는 튜토리얼을 보면 되는 것 같다.
(다른 클라우드 서비스를 보고싶은 경우 왼쪽 목차 상단의 AWS를 누르면 목록을 확인할 수 있다.)
나는 Ubuntu를 사용했기 때문에 모든 설명은 Ubuntu를 기준으로 할 예정이다.
Ubuntu에서의 Terraform 설치는 매우 간단하다.
아래 명령어를 차례로 입력하면 된다.
1
2
3
4
5
6
7
8
|
# gnupg, software-properties-common, curl 패키지 설치 - HashiCorp's GPG signature 검증 및 HashiCorp's Debian package repository 설치에 사용
$ sudo apt-get update && sudo apt-get install -y gnupg software-properties-common curl
# HashiCorp GPG key 추가
$ curl -fsSL https://apt.releases.hashicorp.com/gpg | sudo apt-key add -
# HashiCorp Linux repository 추가
$ sudo apt-add-repository "deb [arch=amd64] https://apt.releases.hashicorp.com $(lsb_release -cs) main"
# update 및 Terraform CLI 설치
$ sudo apt-get update && sudo apt-get install terraform
|
이 후 terraform -help 명령어를 실행했을 때 아래와 같이 설명이 출력된다면 제대로 설치가 된 것이다.
 1
 2
 3
 4
 5
 6
 7
 8
 9
10
11
12
13
14
15
16
17
18
19
20
21
22
23
24
25
26
27
28
29
30
31
32
33
34
35
36
37
38
39
|
$ terraform -help
Usage: terraform [global options] <subcommand> [args]

The available commands for execution are listed below.
The primary workflow commands are given first, followed by
less common or more advanced commands.

Main commands:
  init          Prepare your working directory for other commands
  validate      Check whether the configuration is valid
  plan          Show changes required by the current configuration
  apply         Create or update infrastructure
  destroy       Destroy previously-created infrastructure

All other commands:
  console       Try Terraform expressions at an interactive command prompt
  fmt           Reformat your configuration in the standard style
  force-unlock  Release a stuck lock on the current workspace
  get           Install or upgrade remote Terraform modules
  graph         Generate a Graphviz graph of the steps in an operation
  import        Associate existing infrastructure with a Terraform resource
  login         Obtain and save credentials for a remote host
  logout        Remove locally-stored credentials for a remote host
  output        Show output values from your root module
  providers     Show the providers required for this configuration
  refresh       Update the state to match remote systems
  show          Show the current state or a saved plan
  state         Advanced state management
  taint         Mark a resource instance as not fully functional
  test          Experimental support for module integration testing
  untaint       Remove the 'tainted' state from a resource instance
  version       Show the current Terraform version
  workspace     Workspace management

Global options (use these before the subcommand, if any):
  -chdir=DIR    Switch to a different working directory before executing the
                given subcommand.
  -help         Show this help output, or the help for a specified subcommand.
  -version      An alias for the "version" subcommand.
|
Terraform을 설치하였으니 이를 활용하여 간단한 Nginx 서버를 띄워보려 한다.
테스트를 하기 위해서는 Docker가 설치되어 있어야 한다.
Docker 설치가 완료되었다면 테스트 용으로 폴더를 하나 생성하여 아래와 같이 main.tf를 생성한다.
1
2
|
$ mkdir learn-terraform-docker-container
$ cd learn-terraform-docker-container
|
이 때 main.tf의 내용은 아래와 같다.
 1
 2
 3
 4
 5
 6
 7
 8
 9
10
11
12
13
14
15
16
17
18
19
20
21
22
23
24
25
|
# main.tf
terraform {
  required_providers {
    docker = {
      source  = "kreuzwerker/docker"
      version = "~> 2.13.0"
    }
  }
}

provider "docker" {}

resource "docker_image" "nginx" {
  name         = "nginx:latest"
  keep_locally = false
}

resource "docker_container" "nginx" {
  image = docker_image.nginx.latest
  name  = "tutorial"
  ports {
    internal = 80
    external = 8000
  }
}
|
다음으로 Terraform이 Docker와 상호작용할 수 있도록 하는 플러그인을 다운받기 위해 아래와 같이 프로젝트를 initializing 한다.
 1
 2
 3
 4
 5
 6
 7
 8
 9
10
11
12
13
14
15
16
17
18
19
20
21
22
23
24
25
26
27
|
$ terraform init

Initializing the backend...

Initializing provider plugins...
- Finding kreuzwerker/docker versions matching "~> 2.13.0"...
- Installing kreuzwerker/docker v2.13.0...
- Installed kreuzwerker/docker v2.13.0 (self-signed, key ID 24E54F214569A8A5)

Partner and community providers are signed by their developers.
If you'd like to know more about provider signing, you can read about it here:
https://www.terraform.io/docs/cli/plugins/signing.html

Terraform has created a lock file .terraform.lock.hcl to record the provider
selections it made above. Include this file in your version control repository
so that Terraform can guarantee to make the same selections by default when
you run "terraform init" in the future.

Terraform has been successfully initialized!

You may now begin working with Terraform. Try running "terraform plan" to see
any changes that are required for your infrastructure. All Terraform commands
should now work.

If you ever set or change modules or backend configuration for Terraform,
rerun this command to reinitialize your working directory. If you forget, other
commands will detect it and remind you to do so if necessary.
|
이 후 terraform apply를 입력 할 경우 Enter a value: 라는 입력 칸이 나오며, 이 때 yes를 입력하면 모든 apply가 완료된다.
 1
 2
 3
 4
 5
 6
 7
 8
 9
10
11
12
13
14
15
16
17
18
19
20
21
22
23
24
25
26
27
28
29
30
31
32
33
34
35
36
37
38
39
40
41
42
43
44
45
46
47
48
49
50
51
52
53
54
55
56
57
58
59
60
61
62
63
64
65
66
67
68
69
70
71
72
73
74
75
76
77
78
79
80
81
82
83
84
85
|
$ sudo terraform apply

Terraform used the selected providers to generate the following execution plan. Resource actions are indicated with the following symbols:
  + create

Terraform will perform the following actions:

  # docker_container.nginx will be created
  + resource "docker_container" "nginx" {
      + attach           = false
      + bridge           = (known after apply)
      + command          = (known after apply)
      + container_logs   = (known after apply)
      + entrypoint       = (known after apply)
      + env              = (known after apply)
      + exit_code        = (known after apply)
      + gateway          = (known after apply)
      + hostname         = (known after apply)
      + id               = (known after apply)
      + image            = (known after apply)
      + init             = (known after apply)
      + ip_address       = (known after apply)
      + ip_prefix_length = (known after apply)
      + ipc_mode         = (known after apply)
      + log_driver       = "json-file"
      + logs             = false
      + must_run         = true
      + name             = "tutorial"
      + network_data     = (known after apply)
      + read_only        = false
      + remove_volumes   = true
      + restart          = "no"
      + rm               = false
      + security_opts    = (known after apply)
      + shm_size         = (known after apply)
      + start            = true
      + stdin_open       = false
      + tty              = false

      + healthcheck {
          + interval     = (known after apply)
          + retries      = (known after apply)
          + start_period = (known after apply)
          + test         = (known after apply)
          + timeout      = (known after apply)
        }

      + labels {
          + label = (known after apply)
          + value = (known after apply)
        }

      + ports {
          + external = 8000
          + internal = 80
          + ip       = "0.0.0.0"
          + protocol = "tcp"
        }
    }

  # docker_image.nginx will be created
  + resource "docker_image" "nginx" {
      + id           = (known after apply)
      + keep_locally = false
      + latest       = (known after apply)
      + name         = "nginx:latest"
      + output       = (known after apply)
      + repo_digest  = (known after apply)
    }

Plan: 2 to add, 0 to change, 0 to destroy.

Do you want to perform these actions?
  Terraform will perform the actions described above.
  Only 'yes' will be accepted to approve.

  Enter a value: yes

docker_image.nginx: Creating...
docker_image.nginx: Still creating... [10s elapsed]
docker_image.nginx: Creation complete after 13s [id=sha256:0e901e68141fd02f237cf63eb842529f8a9500636a9419e3cf4fb986b8fe3d5dnginx:latest]
docker_container.nginx: Creating...
docker_container.nginx: Creation complete after 0s [id=a87ec03b595d938ccf082fa8fef1986cdc2061c98db7928a5d928b521c3f1935]

Apply complete! Resources: 2 added, 0 changed, 0 destroyed.
|
docker ps를 통해 확인 해 보면 정상적으로 컨테이너가 생성되어 돌아가고 있는 것을 확인할 수 있다.
1
2
3
|
$ docker ps
CONTAINER ID   IMAGE          COMMAND                  CREATED          STATUS          PORTS                  NAMES
a87ec03b595d   0e901e68141f   "/docker-entrypoint.…"   22 seconds ago   Up 20 seconds   0.0.0.0:8000->80/tcp   tutorial
|
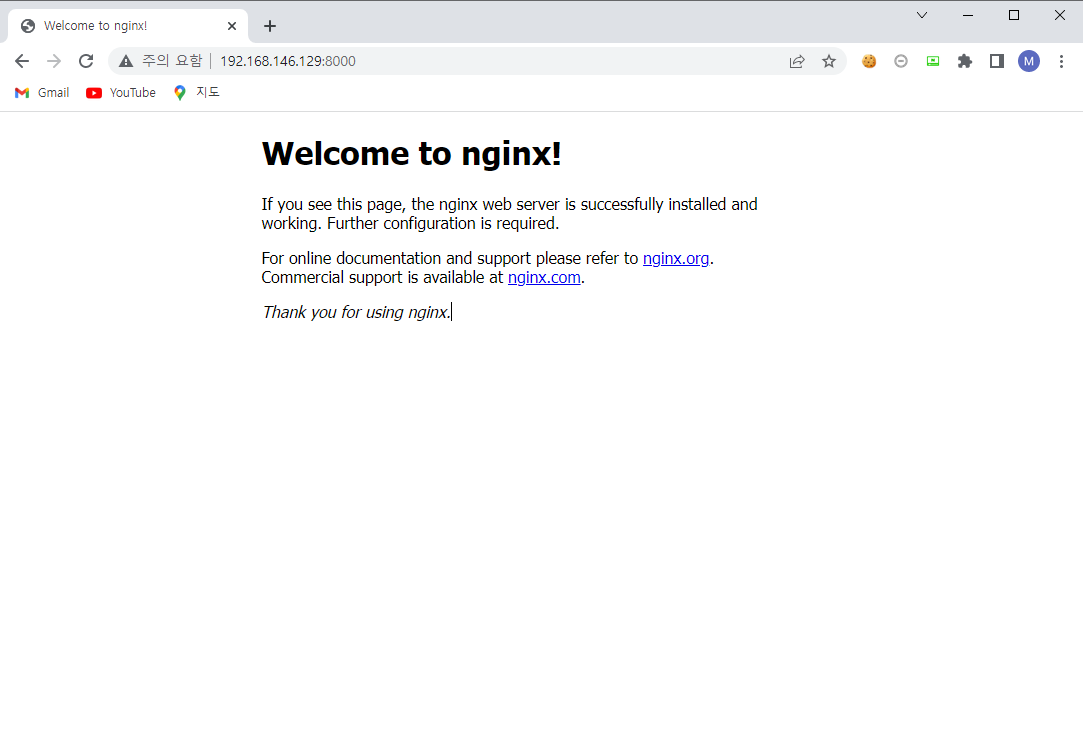
해당 서버의 확인은 Docker를 실행 중인 서버에서 직접 접속 할 경우에는 localhost:8000으로 접속하면 되며, 나같이 가상머신에 구축하고 호스트에서 접속 할 경우에는 가상머신의주소:8000을 입력하여 접속하면 된다.
아래와 같이 Welcome to nginx가 나오면 Terraform 설치 및 첫 번째 테스트 성공이다!